
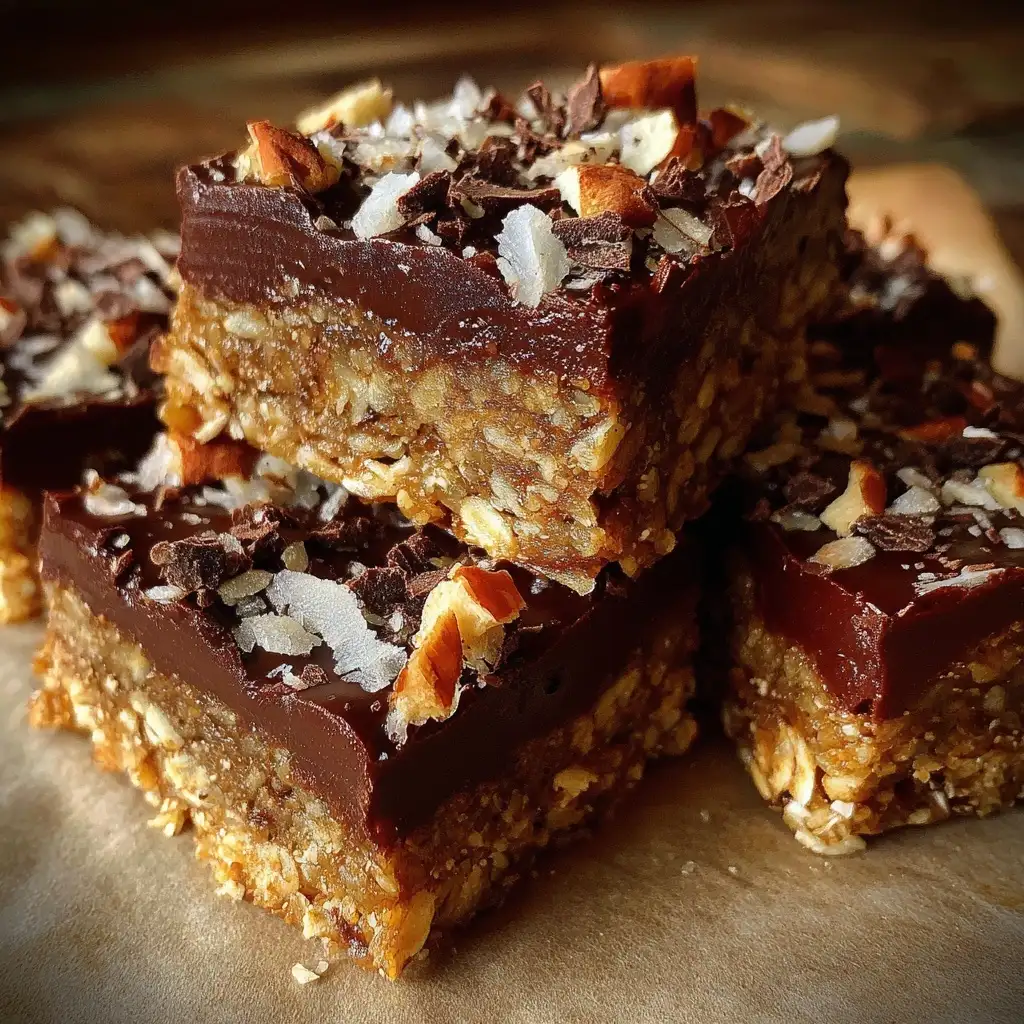
There’s something truly magical about a sweet treat made without the fuss of an oven, especially when it combines two beloved ingredients: chocolate and oats. Imagine coming home after a long day, and the aroma of chocolate fills the air without a single baking sheet in sight. That’s the experience you’ll get with our No Bake Chocolate Oat Bars.
These bars are not just a dessert; they are a comforting hug in a tasty form, perfect for satisfying cravings or fueling your next adventure. They’re rich, chewy, and entirely delightful, bringing together the wholesome goodness of oats with luscious chocolatey notes.
When you’re feeling overwhelmed, a recipe like this one feels like a warm embrace. The best part? You don’t need to turn on the oven, and they don’t take much time or effort to prepare.
With just a few simple ingredients, you can whip up a batch that everyone will love. Whether you’re snacking between meetings, looking for a healthy dessert option, or seeking a delightful treat to share with friends and family, these No Bake Chocolate Oat Bars hit the mark. They’re approachable, wonderfully satisfying, and incredibly easy to make.
The texture of these bars is divine—the oats provide a hearty chew, while the chocolate delivers a rich, sweet finish. You can enjoy them as breakfast on the go, an afternoon pick-me-up, or a delightful dessert. And let’s be honest—who wouldn’t want to indulge in something this delicious without the effort of baking? Follow along, and you’ll discover why each bite of our No Bake Chocolate Oat Bars brings pure joy.
Why You’ll Love This No Bake Chocolate Oat Bars Recipe
First and foremost, we love how approachable this No Bake Chocolate Oat Bars recipe is. With just a handful of ingredients readily available in your pantry, it’s a great option for beginners and seasoned cooks alike. There’s no need for complicated techniques or a lengthy ingredient list. The most challenging part is waiting for them to set in the fridge!
This recipe also brings a comforting vibe to your kitchen. There’s something incredibly satisfying about working with simple, wholesome ingredients. As you mix the oats and chocolate together, you can feel the warmth of nostalgia.
Perhaps it reminds you of childhood afternoons spent in the kitchen. Each bite of these bars takes you back to those cherished moments.
Flavor is key, and these No Bake Chocolate Oat Bars are flavor-packed! The sweetness of the chocolate pairs perfectly with the nutty oats, creating a delightful balance. You can customize the flavors by adding ingredients like nuts or dried fruit, making it your own. Each twist allows you to explore new dimensions of taste, while still enjoying the heart of this recipe.
These bars shine on busy days. You can whip them up in under 30 minutes, and they require minimal clean-up. There’s no need for mixers or complicated baking tools; a bowl and a spatula will do.
Plus, they’re perfect for make-ahead snacks or desserts. Just prepare a batch, store them in your fridge, and you’ll have a delicious go-to treat ready whenever you need it.
The no-fuss aspect doesn’t compromise taste or texture. The result is a batch of No Bake Chocolate Oat Bars that are not only delightful but also flexible according to your pantry staples. Following this simple recipe will leave you with a delicious snack that’s sure to impress everyone around you.
Ingredients You’ll Need
Making these No Bake Chocolate Oat Bars is a breeze, but it all starts with the right ingredients. Below is the complete list you’ll need:
| Ingredient | Amount |
|---|---|
| Old-fashioned rolled oats | 2 cups |
| Natural peanut butter (or almond butter) | 1 cup |
| Honey or maple syrup | ½ cup |
| Chocolate chips (semi-sweet or dark) | 1 cup |
| Vanilla extract | 1 teaspoon |
| Salt | ¼ teaspoon |
Substitutions & Variations
This No Bake Chocolate Oat Bars recipe is quite versatile, allowing for numerous substitutions and variations to suit different taste profiles and dietary needs. For instance, if you’re looking to switch things up, consider using sunbutter instead of peanut butter to make it allergy-friendly. This swap retains that creamy texture while accommodating nut allergies.
If you’re interested in introducing global-inspired twists, think about adding spices such as cinnamon or nutmeg to the mix. A sprinkle of these spices will bring warmth and depth to your bars, enhancing their flavor profile. You could also incorporate some shredded coconut for a tropical flair or substitute chocolate chips with dried fruits like cranberries or chopped apricots for a more adventurous twist.
For a vegan-friendly option, simply replace honey with maple syrup or agave nectar. Furthermore, gluten-free oats can be used to ensure that anyone with gluten sensitivities can join in on the fun. The beauty of these No Bake Chocolate Oat Bars lies in their flexibility. You can easily cater to varying preferences while still delivering on taste.
This No Bake Chocolate Oat Bars recipe is quite versatile, allowing for numerous substitutions and variations to suit different taste profiles and dietary needs. For instance, if you’re looking to switch things up, consider using sunbutter instead of peanut butter to make it allergy-friendly. If you’re interested in introducing global-inspired twists, think about adding spices such as cinnamon or nutmeg to the Lemon Coconut Snowball Cookies.
Step-by-Step Instructions
- Start by gathering all your ingredients. This makes the process smoother. It’s always best to have everything on hand before you begin cooking.
- In a large mixing bowl, combine the old-fashioned rolled oats, peanut butter, honey (or maple syrup), chocolate chips, vanilla extract, and salt. Using a spatula, mix well until everything is fully combined. Note that the mixture will be quite thick, but that’s what makes the bars hearty!
- Once the mixture is well combined, prepare an 8×8 inch baking dish by lining it with parchment paper, allowing some overhang for easy removal later. This simple step saves you from a sticky mess!
- Transfer the oat mixture into the prepared baking dish. Use your spatula or hands to firmly press the mixture into an even layer. Make sure it’s tightly packed so that it holds together once set. You could even use a piece of wax paper to protect your hands while pressing.
- Once pressed, place the dish into the refrigerator. Allow the bars to set for at least 2 hours. This is the hardest part! But trust me, the wait is worth every minute.
- After 2 hours, remove the dish from the refrigerator and use the parchment paper overhang to lift the bars out. Place them on a cutting board and slice into squares or rectangles, depending on your preferred serving size.
- Enjoy your fresh No Bake Chocolate Oat Bars right away or store them for later. It’s like having a little piece of chocolate heaven waiting for you every time you’re in the mood for a treat.
Pro Tips for Success
1. Be generous with the chocolate! If you love chocolate as much as I do, throw in a few extra chocolate chips for a richer flavor.
2. For extra texture, consider folding in some chopped nuts or seeds. This adds a delightful crunch that contrasts beautifully with the creamy oats.
3. If you’re pressed for time, you can melt the chocolate in the microwave before mixing it to ensure a smooth incorporation. Just use intervals and stir to avoid burning!
4. Make a double batch! These bars disappear quickly, so doubling the recipe will ensure you have plenty to enjoy throughout the week.
5. Feel free to experiment with different nut butters. Almond butter or cashew cream adds unique flavors, deepening your No Bake Chocolate Oat Bars experience.
6. Use a sharper knife for cutting through the chilled bars to prevent them from breaking apart. A warm knife helps create clean cuts.
7. Store any uneaten bars in an airtight container in the refrigerator to maintain freshness. They should last for about a week, but you probably won’t have any leftover!
1. Be generous with the chocolate! If you love chocolate as much as I do, throw in a few extra chocolate chips for a richer flavor. 2. For extra texture, consider folding in some chopped nuts or seeds. This adds a delightful crunch that contrasts beautifully with the creamy oats. If you’re pressed for time, you can melt the chocolate in the microwave before mixing it to ensure a smooth incorporation. Just use intervals and stir to avoid burning! For more innovative cookie ideas, check out the Vegan Pistachio Rose Snowball Cookies.
Storage & Reheating Tips
These No Bake Chocolate Oat Bars are super easy to store. If you have any leftovers (though I doubt you will!), simply place them in an airtight container and store them in the fridge for up to a week. This helps them retain that chewy texture and delicious flavor.
If you want to keep them longer, you can freeze the bars. Just cut them into individual servings and wrap each piece in plastic wrap or foil. Place them in a freezer-safe bag or container.
They can last up to 3 months in the freezer. When you’re ready to enjoy one, simply pull it out and let it thaw at room temperature. It’s like having a secret stash of joy waiting for you!
What to Serve With This Recipe
While these No Bake Chocolate Oat Bars are perfect on their own, pairing them with something delightful elevates the experience. Here are a few suggestions to consider:
- Pair with a glass of almond milk for a wholesome breakfast.
- Serve alongside a dollop of Greek yogurt topped with fresh berries for a creamy contrast.
- Enjoy with a scoop of vanilla ice cream for a decadent dessert after dinner.
- Create a mini snack board including these bars, dried fruits, and nuts for a fun gathering.
- A cup of coffee or tea complements these bars beautifully, enhancing their rich flavors.
While these No Bake Chocolate Oat Bars are perfect on their own, pairing them with something delightful elevates the experience. Here are a few suggestions to consider: Pair with a glass of almond milk for a wholesome breakfast. Serve alongside a dollop of Greek yogurt topped with fresh berries for a creamy contrast. Enjoy with a scoop of vanilla ice cream for a decadent dessert after dinner. A popular option to accompany these treats is the No Egg Cookie Recipe.
FAQs
Can I use quick oats instead of rolled oats?
While rolled oats provide the best texture, you can use quick oats if that’s what you have on hand. Just keep in mind that they may create a denser bar.
Is it necessary to refrigerate the bars?
Yes, refrigerating the bars helps them set nicely, making them easy to cut and enjoy. They also maintain better freshness when kept cool.
How do I make these bars nut-free?
Simple! Replace the nut butter with sunflower seed butter or another seed-based spread. This maintains the creamy texture while being allergy-friendly.
Can I add protein powder to the bars?
Absolutely! Adding a scoop of your favorite protein powder can enhance the nutritional profile while still keeping the same great flavor. Just adjust the liquids slightly if needed.
What type of chocolate is recommended for this recipe?
Any chocolate chips you enjoy will work. Semi-sweet, dark, or even milk chocolate can create a delightful variation for your No Bake Chocolate Oat Bars.
No Bake Chocolate Oat Bars combine the wholesome nutrition of oats with the indulgent flavor of chocolate, making them a popular sweet treat without the need for baking. This method of preparation allows for a quick and effortless dessert that has garnered a following among dessert enthusiasts; learn more about their delightful simplicity in the context of desserts.
Nutrition Information (per serving)
| Nutrient | Amount |
|---|---|
| Calories | 180 |
| Protein | 6g |
| Carbohydrates | 22g |
| Fat | 8g |
| Sugar | 10g |
| Fiber | 3g |
| Sodium | 50mg |
No Bake Chocolate Oat Bars
Ingredients
- 2 cups old-fashioned rolled oats
- 1 cup natural peanut butter (or almond butter)
- ½ cup honey or maple syrup
- 1 cup chocolate chips (semi-sweet or dark)
- 1 teaspoon vanilla extract
- ¼ teaspoon salt
Instructions
- Gather all your ingredients.
- In a large mixing bowl, combine the oats, peanut butter, honey (or maple syrup), chocolate chips, vanilla extract, and salt. Mix well until fully combined.
- Prepare an 8x8 inch baking dish by lining it with parchment paper.
- Transfer the oat mixture into the prepared baking dish and firmly press it into an even layer.
- Place the dish into the refrigerator and allow the bars to set for at least 2 hours.
- After 2 hours, lift the bars out using the parchment paper and slice into squares or rectangles.
- Enjoy your No Bake Chocolate Oat Bars or store them for later.
Notes
Note: The video below may differ slightly from the recipe, but offers helpful visual guidance.
