

When it comes to desserts, few combinations bring as much joy as peanut butter and jelly. The nostalgic embrace of these flavors transports us back to simpler times, perhaps when the world felt a bit more carefree. Today, I’m excited to share a recipe that captures that comfort in a delightful twist: Peanut Butter Jelly Blondies.
These blondies offer a chewy, buttery base swirled with pockets of sweet jelly and rich peanut butter. It’s an indulgent treat that will make your taste buds dance and your heart sing.
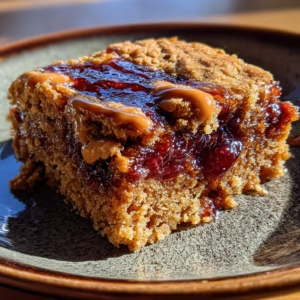
Imagine biting into a warm, gooey blondie, where the creamy peanut butter melds perfectly with your favorite fruity jam. It’s a flavorful adventure that’s also incredibly approachable. With just a few pantry staples, you can whip up a batch in no time. Whether it’s a busy weeknight or a cozy weekend gathering, this recipe for Peanut Butter Jelly Blondies stands ready to satisfy your sweet cravings with minimal fuss and maximum flavor.
These blondies are perfect for all ages and occasions. They make delightful after-school snacks, a sweet treat for your next potluck, or a cozy dessert for movie night. Each bite is brimming with the comforting essence of classic peanut butter and jelly, reminding us that sometimes, the simplest pleasures can bring the greatest joy. Plus, they are easy to customize and can be made in advance, which makes them a winning choice for busy home cooks.
Why You’ll Love This Peanut Butter Jelly Blondies Recipe
This Peanut Butter Jelly Blondies recipe is not just delicious; it’s also refreshingly straightforward. You don’t need to be a master baker to create these treasures. The ingredients are simple, and the process is hassle-free, making it a fantastic option for novice bakers or anyone pressed for time.
These blondies are wonderfully comforting. The creamy texture of peanut butter combined with the fruity sweetness of jelly creates a flavor profile that feels like a warm hug. On a gloomy day, sinking your teeth into a fudgy blondie can instantly lift your spirits. They serve as the perfect pick-me-up, reminding us of childhood favorites while providing a delightful adult twist.
Packed with flavor, each bite of these Peanut Butter Jelly Blondies delivers a delightful balance of sweetness and richness. The buttery blondie base is slightly chewy, and when you get that jelly swirl, it’s a burst of fruity goodness that elevates the entire experience. You truly get the best of both worlds in one fantastic dessert.
For busy days, these Peanut Butter Jelly Blondies shine as a convenient treat that can easily fit into your hectic schedule. You can mix, bake, and enjoy within an hour! Plus, they can be made ahead and stored for later. So, if you need a quick dessert for guests or last-minute cravings, you’ve got it covered.
What I adore most about this recipe is that it’s deceive. It looks and tastes like an extravagant treat but requires no fancy techniques. Just mix everything together, pour into a pan, and let the oven do its magic.
You won’t need to fuss or stress. It’s as simple as that. Ah, bliss!
Ingredients You’ll Need
Before jumping into the fun of making Peanut Butter Jelly Blondies, let’s gather the essential ingredients. It’s always more enjoyable to have everything you need at hand.
| Ingredient | Amount |
|---|---|
| Unsalted butter | 1 cup (2 sticks) |
| Granulated sugar | 1 cup |
| Brown sugar | 1/2 cup, packed |
| Large eggs | 2 |
| Vanilla extract | 2 teaspoons |
| All-purpose flour | 1 1/2 cups |
| Baking powder | 1 teaspoon |
| Salt | 1/2 teaspoon |
| Creamy peanut butter | 1/2 cup |
| Your favorite jam or jelly | 1/2 cup |
Substitutions & Variations
If you’re looking to make this Peanut Butter Jelly Blondies recipe your own, keep reading! There are numerous ways to customize this treat. For a gluten-free version, you can substitute the all-purpose flour with a 1:1 gluten-free baking mix. This ensures everyone can indulge without worry.
If nut allergies are a concern, try sunflower seed butter in place of peanut butter. It provides a similar creamy consistency and nutty flavor, while being nut-free. You could also use apple butter or pumpkin puree in place of jelly for a fun twist. Each option offers a unique and tasty spin on the traditional flavor.
Feeling adventurous? Switch up the flavor profile with global-inspired twists. Use mango chutney or caramelized banana jam for an exotic flare.
These bold flavors can bring an unexpected yet delightful element to your Peanut Butter Jelly Blondies. You might end up discovering your new favorite version!
Moreover, if you want to boost the rich taste, try adding chopped chocolate, toffee bits, or white chocolate chips. They complement the peanut butter beautifully, providing bursts of sweetness with every bite. The possibilities are endless, and that’s the beauty of baking—it’s all about creativity and enjoyment!
If you’re looking to make this Peanut Butter Jelly Blondies recipe your own, keep reading! You can explore different flavor combinations like those featured in our Peanut Butter Banana Cupcakes, which offer a delicious twist on classic flavors.
Step-by-Step Instructions
Now that we have everything ready, let’s whip up those irresistible Peanut Butter Jelly Blondies. Follow these steps for the ultimate baking experience!
- Preheat your oven to 350°F (175°C). Line an 8×8 inch baking pan with parchment paper, leaving an overhang on the sides for easy lifting. This will help you remove the blondies easily later.
- In a medium saucepan over low heat, melt the unsalted butter. Once melted, remove it from the heat and stir in granulated sugar and brown sugar. Mixing it while warm will help dissolve the sugars faster.
- Allow the butter mixture to cool slightly before adding the eggs and vanilla extract. Beat in the eggs one at a time until the mixture is well combined and smooth. This will ensure a rich flavor throughout your Peanut Butter Jelly Blondies.
- In a separate bowl, whisk together the all-purpose flour, baking powder, and salt. Gradually add this dry mixture into the wet butter mixture. Stir until just combined to avoid overmixing, which can make the blondies tough.
- Now, to bring in that delicious peanut butter, fold in the creamy peanut butter into the batter. Use a spatula to combine evenly.
- Pour the batter into the prepared pan, smoothing the top with a spatula. It should be thick and luscious, just like a blondie should be!
- Using a spoon, dollop the jam or jelly over the top of the batter. Then, using a knife or a skewer, gently swirl the jelly into the batter. Don’t mix it too thoroughly; you want those lovely streaks of color and flavor in your Peanut Butter Jelly Blondies.
- Bake in the preheated oven for 25-30 minutes, or until a toothpick inserted into the center comes out mostly clean. Remember, they’ll continue to firm up as they cool.
- Once baked, remove the blondies from the oven and allow them to cool in the pan on a wire rack. After about 15-20 minutes, lift them out using the parchment overhang, and let them cool completely on the rack.
- Cut into squares and share with family and friends or indulge all by yourself—no judgment here!
Pro Tips for Success
Here are some trusty tips to ensure your peanut butter jelly blondies turn out just right:
- For an extra nutty flavor, toast the peanut butter in a pan for a few minutes before mixing it into the batter.
- Use room-temperature eggs for a smoother batter; they incorporate better and lead to a lighter texture.
- Don’t skimp on the cooling time. Let the blondies cool sufficiently before cutting to prevent them from crumbling.
- If you prefer a lighter version, consider using less sugar, but remember, balancing sweetness is key for these blondies.
- Experiment with flavored jellies like raspberry or strawberry for a refreshing twist.
- For a double-chocolate version, mix in cocoa powder with the flour for a fun spin.
- Keep an eye on them towards the end of the baking time. Overbaking can lead to dry blondies.
- To make slicing easier, use a hot, dry knife to cut through the blondie squares.
- For extra gooeyness, slightly underbake them until they are just set but still soft.
- Pair with ice cream immediately after baking for a delectable dessert that feels like a warm hug.
Here are some trusty tips to ensure your peanut butter jelly blondies turn out just right: For more indulgent ideas, you might want to try our Chocolate Peanut Butter Loaf, which adds a rich chocolate flavor that complements the peanut butter perfectly.
Storage & Reheating Tips
You’ll want to savor your Peanut Butter Jelly Blondies, so here’s how to store them! Once cooled completely, transfer them to an airtight container. They will keep for about 5–7 days in the refrigerator.
If you want them to last longer, consider freezing them. Simply wrap each blondie individually in plastic wrap and then place them in a freezer-safe bag. They’ll last up to three months in the freezer.
When you’re ready to enjoy them again, there are a couple of reheating options. For a quick fix, pop them in the microwave for about 10-15 seconds to warm through. For an oven option, preheat to 300°F (150°C) and place the blondies on a baking sheet for about 5-8 minutes. This will keep the texture lovely and moist.
What to Serve With This Recipe
These Peanut Butter Jelly Blondies shine on their own, but they can be even more delectable when paired with other treats. Here are a few suggestions to elevate your dessert experience:
- Serve alongside a scoop of vanilla ice cream for a delightful flavor combo. The creamy ice cream beautifully contrasts the chewy blondie.
- A drizzle of chocolate ganache on top can take the flavor to the next level. The rich chocolate adds another layer of indulgence.
- Pair with fresh fruit like strawberries or banana slices to balance the sweetness with a refreshing touch.
- For a cozy twist, enjoy them with a warm cup of tea or coffee. It’s a perfect afternoon treat!
- If you’re feeling adventurous, warm the blondies and make a s’mores version by adding toasted marshmallows and chocolate!
These Peanut Butter Jelly Blondies shine on their own, but they can be even more delectable when paired with other treats. Consider serving them alongside our Edible Peanut Butter Cookie Dough for an extra layer of peanut butter bliss in your dessert experience.
FAQs
Can I use natural peanut butter for these Peanut Butter Jelly Blondies?
Yes, you can! Just keep in mind that natural peanut butter tends to be a bit thinner, which may slightly affect the texture. Make sure to stir it well before using.
What type of jelly works best?
Any jelly or jam you love works well. Popular choices include grape, strawberry, or raspberry. Feel free to get creative!
Can I add mix-ins like chocolate chips?
Absolutely! Chocolate chips or nuts can add exciting texture and richness. Just fold them in with the batter.
Peanut Butter Jelly Blondies are a delightful dessert that combines the classic flavors of peanut butter and jelly in a chewy, buttery bar form. The combination of these ingredients creates a nostalgic experience reminiscent of childhood lunches, making them a beloved treat for many.
Nutrition Information (per serving)
| Nutrient | Amount |
|---|---|
| Calories | 210 |
| Protein | 3g |
| Carbohydrates | 30g |
| Fat | 10g |
| Sugar | 13g |
| Fiber | 1g |
| Sodium | 120mg |
Peanut Butter Jelly Blondies
Ingredients
- 1 cup unsalted butter
- 1 cup granulated sugar
- 1/2 cup brown sugar, packed
- 2 large eggs
- 2 teaspoons vanilla extract
- 1 1/2 cups all-purpose flour
- 1 teaspoon baking powder
- 1/2 teaspoon salt
- 1/2 cup creamy peanut butter
- 1/2 cup your favorite jam or jelly
Instructions
- Preheat your oven to 350°F (175°C) and line an 8x8 inch baking pan with parchment paper.
- Melt the unsalted butter in a medium saucepan over low heat, then stir in granulated and brown sugars until combined.
- Let the mixture cool slightly, then beat in the eggs and vanilla extract until well combined.
- In a separate bowl, whisk together the flour, baking powder, and salt, then gradually add to the butter mixture.
- Fold in the creamy peanut butter until evenly combined.
- Pour the batter into the prepared pan and dollop the jam or jelly on top, swirling it lightly with a knife.
- Bake for 25-30 minutes until a toothpick inserted into the center comes out mostly clean. Let cool before cutting.
Notes
Note: The video below may differ slightly from the recipe, but offers helpful visual guidance.
